
When people talk about Sony PVMs for retro gaming, they usually talk about RGB, sharp scanlines, 240p, color accuracy, Trinitron tubes, and how professional video monitors make old games look incredible.
But after using my Sony PVM for months, I found myself coming back to one small button that most retro gamers probably ignore.
It does not sound exciting.
It does not look important.
It is not RGB.
It is not composite.
It is not brightness.
It is not contrast.
It is not a secret service menu setting.
It is just one physical button on the front of the monitor.
And somehow, pressing it completely changed the way I look at retro games on a PVM.
Why This Tiny Button Feels So Different
A Sony PVM already gives retro games a very specific look.
You get sharp scanlines, strong contrast, rich colors, clean geometry, and that professional CRT image that makes 240p games feel alive. That is why so many retro gaming fans chase models like the Sony PVM-14M2E, PVM-20M2E, PVM-14M4E, PVM-20M4U, and other Trinitron broadcast monitors.
But this button changes the feeling.
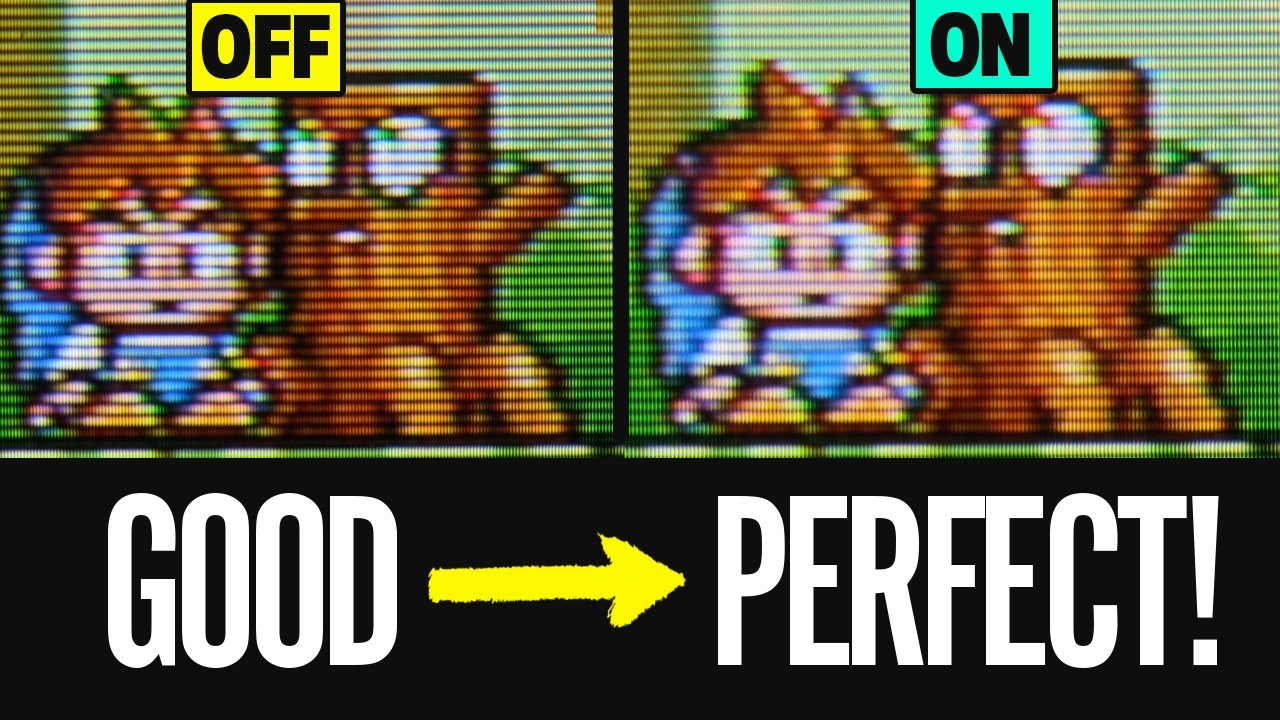
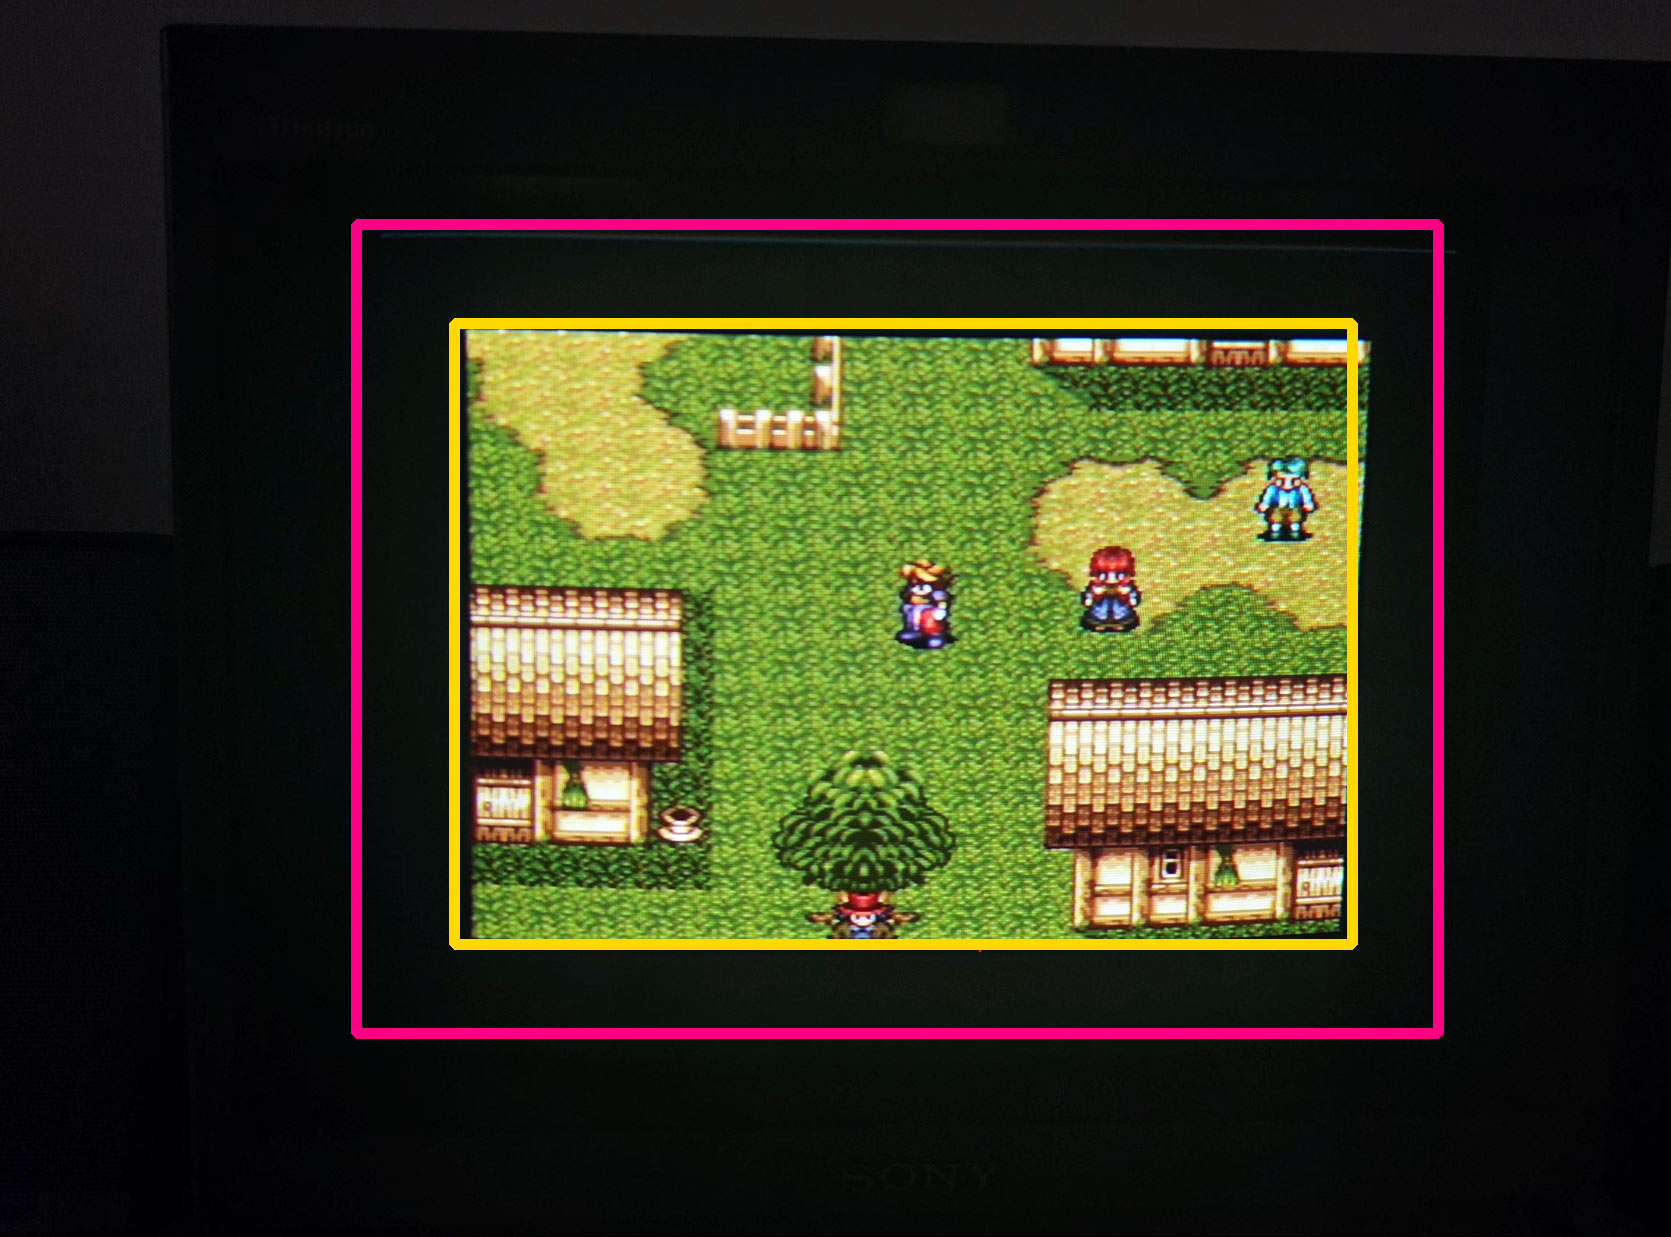
Instead of the image filling the whole screen like a normal TV, the picture suddenly becomes smaller. You see more of the full raster. The game looks compact, cleaner, and almost like a tiny arcade screen or premium desktop CRT setup.
It creates a very different vibe.
The image feels more controlled.
The scanlines look finer.
The corners look sharper.
The whole screen feels more balanced.
And retro games suddenly have this cozy, miniature, “kawaii” look that is hard to explain until you see it.
It almost feels like combining the best parts of a PVM with the charm of a small consumer CRT.
The Button Is Underscan
The button is called underscan.
On a professional monitor, underscan shrinks the image slightly so you can see the entire picture area instead of letting the edges disappear past the visible screen.
That is the opposite of normal consumer CRT behavior.
Most old CRT TVs use overscan, which means the image is enlarged so the messy edges are pushed off-screen. This was normal for old video signals because the edges were not always clean, stable, or important.
Underscan does the opposite.
It says: show me everything.
That is why you may suddenly see borders, top-edge artifacts, white lines, black areas, hidden junk pixels, or unused parts of the signal. The PVM is not necessarily creating those problems. It is revealing areas that normal TVs were designed to hide.
And for retro gaming, that can be weirdly beautiful.
Why Underscan Can Make Retro Games Look Better
Here is the part that surprised me.
Underscan is technically a monitoring feature. It was made for checking the full video image, not for making games look cooler.
But on a PVM, it can make retro games feel amazing.
Because the image becomes smaller, the picture can feel more focused and dense. The scanlines may appear tighter. The phosphor structure becomes more noticeable in a pleasing way. Bright colors can feel more intense because the whole image is compact and punchy.
It is not “better” in the normal objective sense.
It is better in the emotional sense.
For some games, underscan makes the image feel like a tiny high-quality CRT display sitting inside the PVM. It gives the screen a charming, toy-like, handheld feeling while still keeping the professional sharpness of a Sony Trinitron monitor.
That is why this button is so interesting.
It changes the mood of the game.
It Also Reveals the Ugly Stuff
There is one catch.
Because underscan shows more of the full image, it can also reveal things that were never meant to be visible.
You might see:
- white lines at the top
- unstable edges
- unused border pixels
- hidden garbage graphics
- black bars
- overscan junk
- weird top or side artifacts
This does not always mean something is wrong with your PVM.
A lot of old games were designed with consumer CRT overscan in mind. Developers knew that normal TVs would crop the edges, so they often did not waste time making those areas perfect.
On a regular CRT TV, you never see it.
On a PVM in underscan mode, you suddenly see everything.
That is part of the charm and part of the problem.
Why Retro Games Were Designed This Way
Old consoles like the SNES, Super Famicom, Sega Genesis, Mega Drive, NES, PlayStation, and Sega Saturn were made for CRT televisions.
Those TVs were not all calibrated the same. One TV might crop more from the top. Another might crop more from the sides. Another might shift the image slightly.
So games had to be designed with safe areas.
Important things like health bars, score counters, dialogue boxes, and lives were usually placed away from the extreme edges. The outer parts of the signal could be messy because most players would never see them.
That is why underscan is so revealing.
It shows you the full image, including the parts that were hidden by design.
Why I Actually Like Playing This Way
For pure accuracy, normal scan is probably closer to how most people experienced these games back in the day.
But for fun?
Underscan can be amazing.
It gives the game a completely different presentation. Instead of feeling like a normal TV image, it feels like a small, perfect CRT window. The image has more breathing room. The corners are easier to see. HUD elements are never cut off. And the whole thing feels more like a high-end retro gaming setup.
It especially works well for games with colorful pixel art, strong contrast, and detailed backgrounds.
On a PVM, the smaller image can look incredibly sharp and clean. It makes classic games feel fresh again without using filters, emulation shaders, or modern display tricks.
It is still real CRT light.
Still real scanlines.
Still real analog video.
Just presented in a different way.
Is Underscan the “Correct” Way to Play?
Not really.
Underscan was not originally made as a gaming enhancement. It was made so professionals could inspect the full video frame.
But retro gaming is not only about what is technically correct.
Sometimes it is about what feels best.
If you want the classic consumer CRT experience, normal scan with some overscan is more authentic.
If you want to inspect the full image, see hidden edges, avoid cut-off HUDs, or get that compact PVM look, underscan can be really fun.
Neither is wrong.
They are just different ways to enjoy the same game.
The Best Way to Explain It
The simplest explanation is this:
Overscan hides the messy edges. Underscan reveals the full image.
On a consumer CRT, overscan makes the picture bigger so the edges disappear.
On a PVM, underscan makes the picture smaller so you can see everything.
That is why one little button can change the entire feel of retro gaming.
It is not adding pixels.
It is not improving the console signal.
It is not magically increasing resolution.
It is changing how the CRT presents the image.
And sometimes, that is enough to make the game feel completely different.
Final Thoughts
The Sony PVM underscan button is easy to ignore because it looks like a technical feature, not a gaming feature.
But after using it, I understand why it feels special.
It can make retro games look sharper, smaller, cleaner, and more charming. It can reveal hidden artifacts that normal TVs crop away. It can make a professional monitor feel more like a cozy desktop CRT. And it gives you a different way to appreciate the same 240p games you have played for years.
Most retro gamers obsess over RGB cables, PVM models, scanlines, composite video, component input, and calibration.
But sometimes the most interesting change comes from one simple button on the front of the monitor.
And once you press it, it is hard to unsee.